Tuesday, October 20, 2009

How to Read and Write to File using FileStream

The FileStream class is derived from Stream class. This class can be used for reading from and writing to files such as bytes, characters, strings, and other data-type values to a file. Other class I have used in this sample is StreamWriter. The StreamWriter class's Write and WriteLine members write to a file.

In this sample code, I have used FileStream class to create a text file and StreamWrite to write text to the text file. StreamRead to Read from the text File

First Of all design the Form as following Picture.


And then Do the Following Codings on button click events


Monday, August 17, 2009

LINQ to Objects Example

With this example you will learn how to write the simple link query to find some data in a simple string array of object.

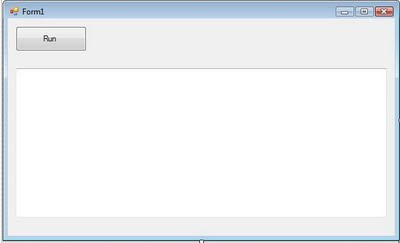
First create Windows Form Application give any project name. Here I will give the project name as LINQtoObject. Then Design the Form using one Button and One textbox like in the picture below.


Now Do the following coding part


How this code work

First step is to reference the System.Linq namespace, which is done automatically by Visual Studio 2008 when you create project.

Next step is to create some data, which is done in this tutorial declaring the a array named names.

Next part of the program is writing the LINQ query.

var queryResults =from n in names where n.StartsWith(“S”) select n;

This is very similar to SQL commands. Isn't it? So if you are familiar with SQL this will very easy to understand for you.

Now Click on the debug button and click the Run button .The you will see the following result inside the textbox.

Query Results:
================
Sandaruwan
Sameera
Sampath
Sanjeewa
Sachith

Understanding the Coding part


Above LINQ query has four parts. The result variable declaration beginning with var , which is assigned using a query expression consisting of the from clause, the where clause, and the select cause. Let's look at each of these part one by one.

Declaring a Variable for result using var Keyword.

The LINQ query start by declaring a variable to hold the results of the query, which is usually done by declaring a variable with var keyword:

var queryResult=

Specify Data Source: from Clause


The next part of the LINQ query is the from clause, Which specifies the data you are querying.

from n in names

Specify Condition: where Clause

In this part of the LINQ query you specify the condition for your query using the where clause. Which look like this:

where n.StartsWith(“S”)

here I specify that the name string starts with the letter S, But you could specify anything else about the instead. For example , a length greater than 10( where n.Length>10) or containing a Q (where n.Contains("Q")).

Select Items: select Clause

Finally , the select clause specifies which items appear in the result set. The select clause look like this.

select n

Thursday, June 25, 2009

Create Your first Crystal Report Application with C#

Here we are going to create a new Crystal Reports in C# from Employee table in the Sample Database(You can make your own database in SQL sever for this). The Employee Table has four fields (EmpID,EmpName,Post,Address) and we are showing the whole data from Employee table to the C# - Crystal Reports project.

In this application we are going to do three task.
1.Create a Crystal report.
2.Generate a PDF document for the relevant report.
3.Generate an Excel document for the relevant report.

Since I want to show you every steps of developing task I uploaded all the documents to the rapidshare.com.You can download it and read the article.

Download Link :
Link 1 .CristalReport.rar
Link 2 .CristalReport.rar

Create PDF File in C#

A pdf application. Convert the content of the TextBox control into a PDF file. That's it.Here You should add the iTextSharp.dll file to your application.If you search the google you can freely download that dll file.

To add the iTextSharp.dll file you can write click on you project->Add Reference->Browse and then you can select the file from your hard drive.


Here is the interface for the application


Here is the code part for the Application


to view clear image please click on the picture.

Sunday, May 10, 2009

Data Retrieval with stored procedure

Introduction
Data Retrieval with stored procedures is the same (surprise!) as if using standard SQL. You can wrap a DataAdapter around the Command object or you can use a DataReader to fetch the data one row at a time.In this example I used the SqlDataReader.

Page Design


SQL Coding Part


C# coding for Button Event

Saturday, May 9, 2009

How to write Stored procedure to Your Data Insert Application

Introduction:

In This article, you will understand what a stored procedure is and how to call one from SQL Sever Database.

Why Use Stored procedure?

There are several advantages of using stored procedures instead of standard SQL.

1. Stored procedures allow a lot more flexibility offering capabilities such as conditional Logic.

2. Because stored procedure are stored within the DBMS, bandwidth and execution time are reduced.This is because a single stored procedure can execute a complex set of SQL statements.

3. Sql server pre-compiles stored procedures such that they execute optimally.

4. Client developer are abstracted from complex designs.They would simply need to know that stored procedure's name and the type of fata it returns.


Here I used ASP.NET application for demonstrate this tutorial.Also this is same for the C# desktop application too.

Creating Stored procedure:

First You have to create Table name called StudentInfo and insert stored procedure for that.You can see the SQL coding for that in below.


CREATE PROCEDURE [dbo].[tblStudentInfo] - In this code, we are telling SQL Server to create a new stored procedure with the name tblStudentInfo.We Specify the body of the stored procedure after this coding part.

Calling Stored procedure:
Create a new ASP.NET Page like in below and Double click on button and do the following coding.


Coding part


After completing the coding part you can build and Run you project.If you did the all the thing correctly you can insert the data to Table via stored proocedure.

ASP.NET Form with MS SQL database

In this tutorial I'm going to show you how to insert the data to SQL database in ASP.NET.It is very similar to the C# desktop application.You can see web form below .It has four fields.When I click insert button i want to insert the form data into table called StudentInfo.


In here also, I did the all the coding part for the insert button.

Friday, May 8, 2009

Working with DatagridView and SQL Database

This lesson will show you how to display data using .NET DataGridView control, C#.NET.The DataGridView control is a powerful tool and is simple to implement.

First you will need to import the System.Data.SqlClient namespace.The System.Data.Sqlclient namespace contain the sqlCommand and SqlConnection classes that we need in order to connect to our database and to send SQL command to it.

First we will look at our Simple Form design.


Here we will do the coding only for the button click event and here is the coding part for the Button click event.


And Here is final result.

Connect You C# Form Application with MS SQL server Database

Inserting data into SQL is pretty straightforward and simple. Using the SQL command string, you insert specific values for specific columns. The actual insertion is initiated using the cmd.Execute-NonQuery() command. This executes a command on the data when you don’t want anything in return.


using System.Data.SqlClient
– This namespace defines a data provider for the SQL Server 7.0 or higher databse.It contains classes such as sqlconnection and sqlcommand.

ConnectionString - This property allows you to read or provide the connection string that should be used by the SqlConnection object.
CommandText – This read/write property allows you to set or retrieve either T-SQL statement or the name of the stored procedure.
Connection – This read /write property gets or sets the sqlConnection object that should be used by this command Object..
ExecuteNonQuery – This method executes the command specified and return the number of row affected.

Thursday, February 12, 2009

Splitting and joining files

In this article I'm going to teach you how to build simple file splitter and joining program.This simple application allow you to split single file into many output file and also it allows you to recombine them together.

By using this application you can send the executable file through the email attachment.Because lot of email providers do not allow to send executable file as a attachment.But if you can split executable file into many out put then you can send them as a email attachment.and receiver can reconstruct the files again.

First We will design the the form.


For develop this application we want to use FileStream and FileInfo classes.So we need to add System.IO statement.

Here is the coding part for this application.And most of the part commented.


Creating a Port Scanner with C# Windows Forms Application

This simple application will allows you scan Open port of your PC.And this small application will help to to check the security of your PC.

here we are going to use TCPClient to check whether port is open or not.That means if TCPClient connected with the port then port is Opened.Other wise port is closed.

First We will design the Interface.


And the you can see the coding part below.


And final out put will be look like this.