Monday, May 31, 2010

Retrieve Information About a File

Following example takes a file path from textbox named by txtpath, and the display the information about the file.

User Interface


Coding Part
using System;
using System.Collections.Generic;
using System.ComponentModel;
using System.Data;
using System.Drawing;
using System.Linq;
using System.Text;
using System.Windows.Forms;
using System.IO;

namespace FileUpload
{
    public partial class Form2 : Form
    {
        public Form2()
        {
            InitializeComponent();
        }

        private void btnSelect_Click(object sender, EventArgs e)
        {
            string fileName = "";
            string path = "";
            OpenFileDialog fDialog = new OpenFileDialog();
            fDialog.Title = "Attach customer proposal document";
            fDialog.Filter = "Doc Files|*.doc|Docx File|*.docx|PDF doc|*.pdf";
            fDialog.InitialDirectory = @"C:\";
            if (fDialog.ShowDialog() == DialogResult.OK)
            {
                fileName = System.IO.Path.GetFileName(fDialog.FileName);
                path = Path.GetDirectoryName(fDialog.FileName);
                txtpath.Text = path + "\\" + fileName;

            }
        }

        private void btnShowInfo_Click(object sender, EventArgs e)
        {
            //To display file information
            FileInfo myFile = new FileInfo(txtpath.Text);

            rtxtInfor.Text = "Checking File: " + myFile.Name+"\n";
            rtxtInfor.Text=rtxtInfor.Text+"File exists: "+myFile.Exists.ToString()+"\n";

            if (myFile.Exists)
            {
                rtxtInfor.Text = rtxtInfor.Text + "File Created:" + myFile.CreationTime.ToString() + "\n";
                rtxtInfor.Text = rtxtInfor.Text + "File Last Updated: " + myFile.LastWriteTime.ToString() + "\n";
                rtxtInfor.Text = rtxtInfor.Text + "File Last accessed: " + myFile.LastAccessTime.ToString() + "\n";
                rtxtInfor.Text = rtxtInfor.Text + "File Size (bytes): " + myFile.Length.ToString() +"\n";
                rtxtInfor.Text = rtxtInfor.Text + "File attribute list: " + myFile.Attributes.ToString() + "\n";

            }


        }
    }
}


Sunday, May 30, 2010

Upload Files to Remote PC

Here first You have to create a folder in remote machine and You have to share that folder with other network users.

And then using following method you can upload files to the remote shared folder. public int FileUpload(string SourceFilepath)
{
try
{
WebClient client = new WebClient();

//Credential information for remote Mechine.-> here I used Username=erandika1986 and Password=123
NetworkCredential nc = new NetworkCredential("erandika1986", "123");

//Here we have to give destination information
Uri addy = new Uri(@"\\192.168.2.4\UploadDocs\" + fileName);

//Here we set the the credential information to the Webclient
client.Credentials = nc;

//upload the file from Source to the destination
client.UploadFile(addy, SourceFilepath);

return 1;

}
catch (Exception ex1)
{
MessageBox.Show(ex1.Message);
return 0;
}

}

Saturday, May 29, 2010

Send Email using SMTP Server

The .NET Framework includes the System.Net.Mail namespace, whcich provides classes to create and send email messages.Messages can include plain text,HTML and attachments

Creating & Send an email

Here We will create a class called email and we will implement the method called SendEmail inside the class.

Here the implemented class

***********************************************************
Remember you should add namespace "System.Net.Mail" first
***********************************************************

public class email
{
public int SendEmail()
{
try
{
//Create a MailMessage object
MailMessage mail = new MailMessage();

//To specify sender email address and Sender name
mail.From = new MailAddress("sender Email address", "Sender name");

//To specify recipient email address and recipient name
mail.To.Add(new MailAddress("recipient email address", "recipient name"));

//Set email Subject
mail.Subject = "Sample Email";

//Specify as HTML message body
mail.Body ="This is my message body";

//To Enable HTML body->You can type your message body using html tag.But blogger not support to post html tag in here.To enable HTML body you can use following code line.
//mail.IsBodyHtml = true;

//Attach files
mail.Attachments.Add(new Attachment(@"D:\oracle_database_11g.pdf"));


//Create a SmtpClient object
SmtpClient client = new SmtpClient();

//Assign a host for the client
client.Host = "smtp.gmail.com";

//Assign a port
client.Port=587;

//Give Credential information->Username and Password
client.Credentials=new System.Net.NetworkCredential("Your Username","Your Password");

//To enable SSL
client.EnableSsl=true;

//Send the mail
client.Send(mail);

return 1;
}
catch (Exception ex1)
{
MessageBox.Show(ex1.Message);
return 0;
}
}


}

How to use MS Outlook API to send mails

First You have to add Microsoft.Office.Interop.Outlook using References.To do that go to Solution Explorer->Reference->Add Reference->.NET tab->Microsoft.Office.Interop.Outlook.

After that we will create a small class called SendEmails and we will implement a method called sendGroupmail.

Here the Implementation for SendEmails Class.

public class SendEmails
{
public int sendGroupMail(string recipientsList, string subject, string body)
{
Outlook.Application objectOutLook = new Outlook.Application();

try
{
Outlook.MailItem mailItem = objectOutLook.CreateItem(Outlook.OlItemType.olMailItem) as Outlook.MailItem;
mailItem.Subject = subject;
mailItem.To = recipientsList;
mailItem.Body = body;
Outlook.NameSpace ns = objectOutLook.GetNamespace("mapi");
ns.Logon(Missing.Value, Missing.Value, true, true);
mailItem.Importance = Outlook.OlImportance.olImportanceLow;
((Outlook.MailItem)mailItem).Send();
ns.Logoff();
return 1;
}
catch (Exception ex2)
{
MessageBox.Show(ex2.Message);
return 0;
}

}
}


How to use this class.........

SendEmails newemail=new SendEmails();
int result = newemail.sendGroupMail("example@mail.com", "This is Subject", "This is Body")
;

Saturday, April 10, 2010

How to connect MySQL Database with C#

MySQL database is a low cost alternative to MS SQL Server database and can be used with web application (ASP.NET) and Windows Application. In this article I will explain the steps to connect to MySQL database from windows Form Application.

Major requirement : First of all you have to download and install MySQL ODBC 3.51 Driver. You can download it from following URL.

http://dev.mysql.com/downloads/connector/odbc/3.51.html


In this example I will implement the basic search functionality using MySQL database table data.

Below picture you can see the Form designing part.


How this works.
1.User enter valid employee ID and click on search button.
2.Then application with connect to the database named “employees” and from relevant table (emp) application will select the Emp Name and Emp Age and those two data will display on relevant text boxes.

Below you can see coding part for this application.

using System;
using System.Collections.Generic;
using System.ComponentModel;
using System.Data;
using System.Drawing;
using System.Linq;
using System.Text;
using System.Windows.Forms;
using System.Data.Odbc;

namespace WindowsFormsApplication5
{
public partial class Form1 : Form
{
public Form1()
{
InitializeComponent();
}

private void Form1_Load(object sender, EventArgs e)
{

}

private void btnSearch_Click(object sender, EventArgs e)
{
//Connection string for the MySQL Database.
string sConString = "Driver={MySQL ODBC 3.51 Driver};" + "Server=localhost;" + "Database=employees;" + "user id=root;" + "password=SLIIT";

OdbcConnection oConnection = new OdbcConnection(sConString);

string sSQL = "SELECT * FROM emp where eid='" + textBox1.Text + "'";

try
{
oConnection.Open();

OdbcCommand cmd = new OdbcCommand(sSQL, oConnection);

OdbcDataReader myReader;

myReader = cmd.ExecuteReader(CommandBehavior.CloseConnection);

myReader.Read();

string name = myReader["ename"].ToString();

string age = myReader["age"].ToString();

textBox2.Text = name;

textBox3.Text = age;
}
catch (Exception ex)
{
MessageBox.Show(ex.Message);
}


}
}
}

Tuesday, October 20, 2009

How to Read and Write to File using FileStream

The FileStream class is derived from Stream class. This class can be used for reading from and writing to files such as bytes, characters, strings, and other data-type values to a file. Other class I have used in this sample is StreamWriter. The StreamWriter class's Write and WriteLine members write to a file.

In this sample code, I have used FileStream class to create a text file and StreamWrite to write text to the text file. StreamRead to Read from the text File

First Of all design the Form as following Picture.


And then Do the Following Codings on button click events


Monday, August 17, 2009

LINQ to Objects Example

With this example you will learn how to write the simple link query to find some data in a simple string array of object.

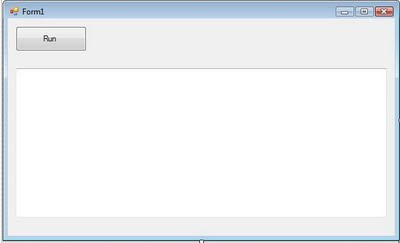
First create Windows Form Application give any project name. Here I will give the project name as LINQtoObject. Then Design the Form using one Button and One textbox like in the picture below.


Now Do the following coding part


How this code work

First step is to reference the System.Linq namespace, which is done automatically by Visual Studio 2008 when you create project.

Next step is to create some data, which is done in this tutorial declaring the a array named names.

Next part of the program is writing the LINQ query.

var queryResults =from n in names where n.StartsWith(“S”) select n;

This is very similar to SQL commands. Isn't it? So if you are familiar with SQL this will very easy to understand for you.

Now Click on the debug button and click the Run button .The you will see the following result inside the textbox.

Query Results:
================
Sandaruwan
Sameera
Sampath
Sanjeewa
Sachith

Understanding the Coding part


Above LINQ query has four parts. The result variable declaration beginning with var , which is assigned using a query expression consisting of the from clause, the where clause, and the select cause. Let's look at each of these part one by one.

Declaring a Variable for result using var Keyword.

The LINQ query start by declaring a variable to hold the results of the query, which is usually done by declaring a variable with var keyword:

var queryResult=

Specify Data Source: from Clause


The next part of the LINQ query is the from clause, Which specifies the data you are querying.

from n in names

Specify Condition: where Clause

In this part of the LINQ query you specify the condition for your query using the where clause. Which look like this:

where n.StartsWith(“S”)

here I specify that the name string starts with the letter S, But you could specify anything else about the instead. For example , a length greater than 10( where n.Length>10) or containing a Q (where n.Contains("Q")).

Select Items: select Clause

Finally , the select clause specifies which items appear in the result set. The select clause look like this.

select n